

Installing adhesive wheel weights correctly ensures proper wheel balance, reduces vibration, and extends tire life. This comprehensive guide covers the complete installation process for adhesive-backed wheel weights, from surface preparation to final verification, helping both professionals and DIY enthusiasts achieve optimal results.

Understanding Adhesive Wheel Weights
Adhesive wheel weights, also known as stick-on wheel weights, are precision-balanced metal strips with pressure-sensitive adhesive backing. These weights attach directly to the wheel’s inner barrel or back flange, providing dynamic balance correction without requiring clip mounting. Modern adhesive weights typically consist of zinc, steel, or lead alloy, with zinc and steel being preferred for environmental compliance.
Adhesive wheel weights differ significantly from traditional clip-on weights in their application method and placement location. Clip-on weights mount to the wheel lip using spring clips, while adhesive weights bond to flat inner wheel surfaces. This distinction affects installation technique, weight placement precision, and overall balancing effectiveness. According to industry standards published by ISO 69487, both weight types must meet specific dimensional and mass tolerance requirements.
Tools and Materials Required
Before beginning installation, gather all necessary tools and materials to ensure a smooth workflow. Professional installation requires specific equipment that cannot be substituted with household alternatives. Using improper tools compromises installation quality and may void wheel weight warranties.
The essential tools and materials include adhesive wheel weights in appropriate gram increments, wheel weight pliers, isopropyl alcohol or dedicated wheel cleaner, clean microfiber towels, a wheel weight scale for verification, protective gloves, and a wheel balancer for confirmation. Wheel weight pliers differ from standard pliers—they feature notched jaws designed specifically for handling and positioning wheel weights without damaging the adhesive backing.
- Wheel weight pliers with notched jaws
- Isopropyl alcohol (70% concentration minimum)
- Clean microfiber towels or shop rags
- Digital wheel weight scale
- Protective nitrile gloves
- Adhesive wheel weights in required gram increments
- Wheel balancer for verification
Wheel Surface Preparation
Proper surface preparation determines adhesive bond strength and long-term reliability. Contaminated or improperly prepared wheel surfaces cause premature adhesive failure, resulting in weight separation during vehicle operation. This step cannot be rushed or skipped under any circumstances.
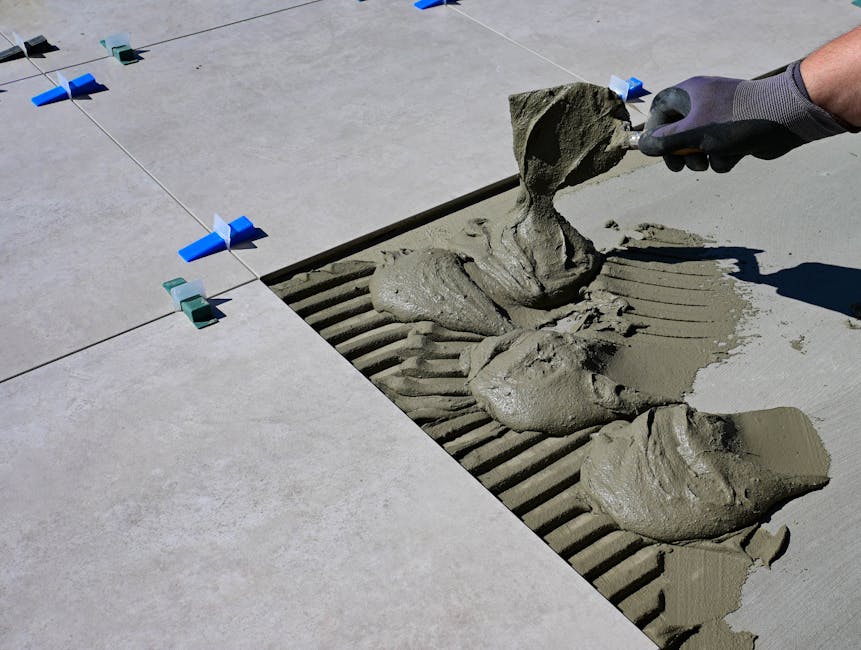
Begin by removing the wheel from the vehicle and mounting it securely on a wheel stand or balancer. Clean the target installation area thoroughly using isopropyl alcohol applied to a clean microfiber towel. Wipe in a single direction to avoid spreading contamination. Allow the surface to dry completely before proceeding—moisture beneath the adhesive dramatically reduces bond strength.
Inspect the wheel surface for existing adhesive residue, corrosion, or paint defects. Remove any old wheel weight adhesive using plastic scraper tools to avoid damaging the wheel finish. The installation surface must be smooth, dry, and free from any oils, waxes, or cleaning product residues. Even fingerprints contain enough oil to compromise adhesive performance.
Determining Correct Weight Placement
Accurate weight determination requires wheel balancing using professional equipment. The balancer measures imbalance in both planes and indicates the exact gram weight needed for each position. Installing incorrect weights wastes time and may require rebalancing.
Modern computer-controlled balancers display weight requirements in grams and show precise placement locations. Adhesive weights install on the inner wheel surface directly opposite the heavy point identified by the balancer. For dynamic balancing, weights install at two positions (inner and outer), while static balancing typically requires one weight location. Record the balancer readings before removing the wheel from the machine.
Common balancing approaches include dynamic balancing, which corrects imbalance in two planes and is standard for modern vehicles, and static balancing, which addresses single-plane imbalance primarily for older vehicles or dedicated show cars. Dynamic balancing produces superior results for daily-driven vehicles and represents current professional practice.
Step-by-Step Installation Process
Follow this systematic installation procedure to achieve secure, properly positioned wheel weight application. Each step builds upon the previous one, creating a reliable installation when completed correctly.
- Position the wheel securely on the balancer or stand with the inner surface facing you.
- Locate the exact weight position indicated by the balancer measurement.
- Measure the required weight on a calibrated scale to verify accuracy.
- Peel the backing liner from the adhesive wheel weight, exposing the sticky surface.
- Align the weight carefully with the marked position on the wheel.
- Apply firm, consistent pressure across the entire weight surface for minimum 10 seconds.
- Release pressure and verify the weight adheres firmly without lifting edges.
- Reinstall the wheel on the balancer to confirm proper correction.
When handling the wheel weight, avoid touching the adhesive surface with bare fingers. Skin oils reduce adhesive effectiveness. Use nitrile gloves throughout the installation process and handle weights from the edges only. If the weight requires cutting to fit specific spaces, use aviation snips or dedicated wheel weight cutters for clean, accurate cuts.
Common Installation Mistakes to Avoid
Several frequent errors compromise adhesive wheel weight installations and should be avoided through careful attention to technique and process. Understanding these mistakes helps prevent costly rework and ensures reliable, long-lasting installations.
Surface contamination remains the primary cause of adhesive weight failure. Even trace amounts of brake dust, silicone, or hand lotion undermine bond strength. Always clean surfaces immediately before installation, not hours in advance. Temperature also affects adhesive performance significantly—installation temperatures below 50°F (10°C) or above 100°F (38°C) reduce initial bond strength.
- Installing weights on contaminated or improperly cleaned surfaces
- Applying weights in temperatures outside recommended 50-100°F range
- Touching adhesive surfaces with bare skin or oily tools
- Installing incorrect weight amounts without verification
- Failing to apply sufficient pressure during installation
- Placing weights over wheel surface imperfections or welds
- Rushing the adhesive curing time before vehicle operation
Weight positioning errors also occur frequently, particularly when installers rush the process. Always mark the balancer-indicated position before removing the wheel from the machine. Cross-reference measurements to ensure weights install at the correct angular position. Incorrect positioning produces opposite imbalance, making the original problem worse.
Temperature and Environmental Considerations
Adhesive wheel weight performance depends heavily on environmental conditions during and after installation. Temperature fluctuations affect both adhesive curing and long-term bond stability. Professional installers maintain climate-controlled shops for consistent results.
The ideal installation temperature range falls between 60°F and 80°F (15°C and 27°C). Within this range, adhesive achieves optimal flow and initial bonding. Below 50°F, adhesive becomes too viscous for proper surface contact. Above 100°F, adhesive may cure too quickly, preventing adequate initial bond formation. After installation, allow 24 hours before exposing wheels to car washes, pressure washing, or extreme temperature changes.
Humidity also affects adhesive curing, though less dramatically than temperature. Extremely high humidity may extend curing time, while very low humidity has minimal negative impact. When working in non-ideal conditions, extend the post-installation cure time proportionally before vehicle operation on wet roads or through automated car washes.
Quality Verification and Final Checks
Verification confirms correct installation before returning the vehicle to service. Skipping verification risks customer comebacks and potential safety concerns from improperly balanced wheels. Balance verification should occur on the same machine used for initial measurement whenever possible.
Mount the wheel on the balancer and spin to verify residual imbalance falls within acceptable tolerance. Professional standards typically require final imbalance under 5 grams per plane for satisfactory completion. If readings exceed this threshold, investigate potential causes including adhesive failure, incorrect weight selection, or machine calibration issues.
Visual inspection supplements quantitative verification. Confirm all weights sit flat against the wheel surface without raised edges or visible gaps. Check that no adhesive has squeezed beyond the weight perimeter during installation. For fleet or commercial installations, document verification readings for quality control records and warranty purposes.
Adhesive Wheel Weight Selection Guide
Choosing the correct adhesive wheel weight type affects installation success, compatibility, and long-term durability. Different materials offer distinct advantages and limitations that should guide selection decisions.
| Material | Weight per Volume | Corrosion Resistance | Environmental Compliance | Typical Cost |
|---|---|---|---|---|
| Zinc | Moderate | Excellent | RoHS Compliant | Moderate |
| Steel | High | Good (coated) | Fully Compliant | Lower |
| Lead | Highest | Good | Restricted | Lower |
| Tungsten | Highest | Excellent | Fully Compliant | Higher |
Zinc and steel weights have largely replaced lead weights in professional applications due to environmental regulations. Both materials provide adequate weight density for most passenger vehicle applications. Steel weights require protective coating to prevent visible corrosion on exposed areas, while zinc naturally resists corrosion without additional treatment.
Maintenance and Inspection Recommendations
Regular inspection of installed wheel weights identifies potential problems before adhesive failure occurs. Scheduled inspections should occur during routine tire rotations, brake service intervals, or any wheel removal procedure.
During inspection, verify each weight maintains full surface contact with the wheel. Press gently on weight corners and edges to detect any lifting or debonding. Check for corrosion on uncoated steel weights, particularly in regions using road salt during winter months. Document any deficiencies for customer notification and corrective action.
Properly installed adhesive wheel weights typically remain secure throughout the tire’s service life. However, exposure to harsh chemicals, pressure washing, or mechanical stress may cause premature degradation. Educating customers about appropriate wheel cleaning methods reduces maintenance-related failures significantly. For web-based documentation and service records, following WCAG accessibility guidelines ensures content is accessible to all users.
Conclusion
Installing adhesive wheel weights requires attention to surface preparation, environmental conditions, and precise placement. Following the systematic procedure outlined in this guide ensures reliable, professional-quality installations that provide lasting wheel balance correction. Professional installers understand that adhesive wheel weight success depends equally on technique and environmental factors.
The shift from clip-on to adhesive wheel weights reflects industry evolution toward cleaner, more precise balancing solutions. Modern adhesive technologies offer excellent durability when properly applied. By avoiding common mistakes and following verification protocols, installers achieve consistent results that satisfy customers and reduce costly comebacks.
Frequently Asked Questions
How long do adhesive wheel weights last?
Properly installed adhesive wheel weights typically remain secure for the life of the tire, often 3-5 years or longer. Adhesive degradation occurs faster when exposed to harsh chemicals, extreme temperatures, or mechanical stress from potholes and curb contact.
Can adhesive wheel weights fall off?
Adhesive wheel weights can fail and separate if installed on contaminated surfaces, in extreme temperatures, or with insufficient initial pressure during application. Surface preparation and installation technique determine long-term reliability.
What temperature is too cold for installing adhesive wheel weights?
Temperatures below 50°F (10°C) significantly reduce adhesive bond strength. Installation should occur in climate-controlled environments or during warmer periods. If cold installation is unavoidable, extend cure time before vehicle operation.
How much weight should be placed on each wheel?
Weight requirements vary based on wheel and tire assembly imbalance. Professional wheel balancers measure actual imbalance and display required weights in grams. Modern vehicles typically require 0-3 ounces per wheel, though heavier wheels or tires may need more.
Can you install adhesive wheel weights over old adhesive residue?
Never install new adhesive weights over existing adhesive residue. Old adhesive must be completely removed using plastic scrapers and surface cleaner. Contamination beneath new adhesive causes bond failure and requires rework.
Post time: Jun-17-2026
